Photoshoptip: Editing
You know the photo of me eating a strawberry? I thought I was going to show you how it is edited. I always use Photoshop cs5 and I started off in Camera Raw by changing the exposure, contrast and colors.
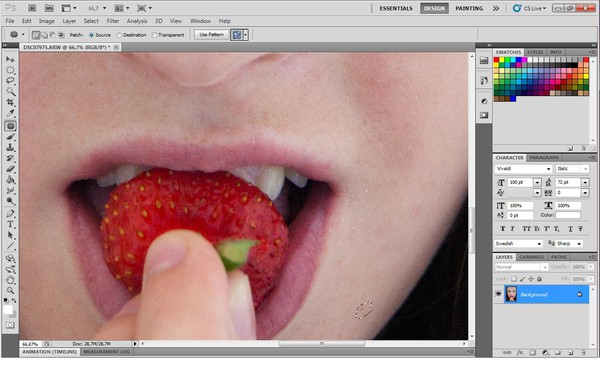


Then I moved on to Photoshop, where I used the Patch Tool to erase freckles and birthmarks that can make the photo a bit messy. But I don't delete too many, because then it doesn't look natural.
When taking photographs the focus point is very important, in my case the eyes. Therefore I want to increase the contrast in the eyes so they look sharp and to bring out the details. You mark the eye using Lasso Tool. To increase the contrast you can go to Image- Adjustments- Brightness/contrast. I changed the brightness to 18 and the contrast to 16. On the other eye (the one that it not marked) I changed the brightness to 5 and the contrast to 11.
I want the strawberry to look more red, to do thay you go to Image- Adjustments- Curves. Change the channel to red. There you can experiment a bit to get the red color you want.
The last thing I do is to do some small changes, like making the teeth more white by using the Dogde Tool. By using curves you can change the preset to change different things, for example contrast or cross process.
Final result:
Hope you like it!
Camera Raw
If you have an SLR (systemkamera in Swedish) you can change the "quality" to for example JPEG. I'm sure all of you have heard of JPEG. But you can also change to RAW, which is what it sounds like... the photo is almost grey. The colors are not so strong and the photo is just dead. Why is that good then? If you've got Photoshop it's very good to change to RAW. That's because when you upload a photo in Photoshop, Camera Raw automatically comes up.

This is how Camera Raw look, you can change the temperature and tint, which are the colors and they affect the white balance. Exposure is if the photo is going to be darker or lighter and recovery makes the highlights darker or lighter. Fill light makes the darkest points lighter and blacks make them darker. Guess you know what brightness is and contrast is how sharp it is. Clarity make the photo look clearer, not so blurry. Then the vibrance, which is if you want some blue, yellow or pink tones, for example. Last is saturation which is how strong the colors are. There are many more tabs, like Tone Curve and Detail but I'll go deeper into that another time. These are the basics for Camera Raw.
